Following on from my extensive verbal diarrhea on all the tools and accessories you might need to get started painting miniatures I will now, as promised, use far too much time and space to ramble on about paints and how I use them.
Now, first and foremost, use your paints however the fuck you want to use your paints. I’m openly not particularly awesome at this stuff, but do love it so, and as such I have my own approaches that work for me and may well work for you. However if I happen to mention that you’re probably Satan if you don’t prime your minis… just assume this is in jest and ignore me, I literally don’t know what I’m on about 99% of the time and am always open to new approaches (so long as they include priming minis because I’m not Satan)
My Setup
Now, one certainly doesn’t need to have the ridiculous setup I have here (indeed arguably one needs more… but let’s table that for now) but below is my current selection of paints and paint related wossnames.

Predominantly I use citadel paints – I’ve always used citadel paints. One of the weird little bits of nostalgia that painting brings me is that a number of the paints they make today still taste like the paints of my youth (I’m not weird, you’re weird). This isn’t because I purposefully eat the paint directly out of the pot or anything, but I swear to the pantheon of chaos gods that one of the 1990’s White Dwarf painting tips was literally to use your lips to bring your brushes to a fine point, and so I still do that to this day. So long as nobody is watching. Leadbelcher tastes the same as the old metal paints from back in the day. So either I’m a supertaster or am going to die of paint toxicity or possibly both.
My technique(s)
Generally I follow a pattern with my painting, occasionally trying out something new, but not so frequently. No contrast paints for me (if only because I’m a weenie who won’t try new things).
Priming
I always prime. Always. Blame it on my upbringing or whatever. I fully believe that citadel base paints will stick to a model just fine. I still won’t paint without priming first. Too many pewter models from my youth (including a now missing Ghazghkull and Makari) chipped to buggery in days because as a youth I was sloppy.


The troll above illustrates the why. Sadly this is one of only a handful of models I have left after I foolishly left the country and all my old models behind, forgotten. (A whole heap of fantasy battle and OG rogue trader marines/orks) It also illustrates just how far GW have come with models in that time. Although this guy is cool in his own way.
Initially when I got back into the hobby I was rocking GW spray paints as a primer – Death Guard Green for my plague boys, Mephiston red on my Blood angels. Good start for them with the downside of the spray cans being pretty pricey, outdoors only, and sensitive af to environment (see previous post). After getting set up with an airbrush I’m a big fan of vallejo black surface primer and a couple of their mecha range when black is… too much. They go on thin, don’t obscure details, and hold paint like a boss.

Base Color
Following priming I will generally paint on the base colors, unless the model is especially large and I am feeling particularly serene. If the latter conditions hold I’ll airbrush the thing – citadel paints go through the airbrush just fine so long as you keep it clean, thin them just right, and use exactly the right amount of flow improver. Luckily the ratio of water and flow improver to paint varies by color/day of week/how many cats are within an 8 mile radius, so much swearing can be had at this stage if the planets don’t align.
Being lazy I’m generally following the box instructions, or Duncan, or some tutorial online for a feel on which base colors to use – over time you fall into a pattern. Death guard for me is always Death Guard Green as a starter, Blood Angels is Mephiston Red. Iron/Steel – Leadbelcher (although I need to expand my horizons) etc.
First rule of base coat club is thin your paint. (this is, indeed, the first rule of all the painting coat clubs) Generally I’ll eyeball about a 1:1 paint to water mix, although again it depends largely on the color you’re using – for leadbelcher I tend to not water at all and just go with a moist brush. Because otherwise it looks like ass, and not in a good way.
Thinning the base coat, particularly over black, often means 2 coats of paint. Or, if you’re going for a white look and primed black because you don’t think more than 10 minutes ahead…. 16 coats. This is a good thing. (well, not 16 coats, but I don’t learn so it can’t be that bad) a couple coats of thin paint which retains all the lovely details is far superior to a big fucking dollop of bullshit which swamps everything. The recent offerings from Games Workshop particularly are full of beautiful little recessed details which will 100% disappear if the humidity in the room gets too high (not quite…. but close)
Generally I’ll try to get everything, bar maybe weapons and detail stuff like gems or grenades (or entire fucking belts because they technically don’t exist in this dimension until after you think you’re done) before moving on to the next step. This is mostly because I am sloppy af with base coating and worry about losing detail from one area while basing another and not anything to do with proper technique at all.
Shades
This is where shit gets real and looks pretty damn good from the moment you finish this step. Once all the base coats are dry you want to take a look at the model and figure out if it’s all gonna be grimdark craziness or if you want to just focus shadows in certain areas. Either way citadel shades are, essentially, cheat mode.
For something like a Plague marine if you just wash the whole thing with agrax earthshade, you can stop right there and be pretty happy with what you have (I don’t stop right there, because I ain’t right… but sensible people absolutely can) – just avoid pooling too much on the model (once the shade is down you have a few minutes to remove excess with a fresh brush tip before it starts to dry) – shade will flow into recesses, pull colors together a bit, and make everything dingy dark and awesome looking.
For a Blood Angel (or other marine, although if you’re not a fucking space vampire or a traitor marine why even?) I tend to go in with nuln oil and just do a pin wash – carefully applying the shade to the recesses only – its more work but looks amazing and leaves the rest of the model super clean (making the base coat a tad more important to have even)
Other go to shades for me are Druchii violet on anything purple – from cloaks to guts to sword hilt wraps. Reikland fleshshade on golds (pretty gold anyway, DG get agrax), horns, flesh. Drakenhof nightshade on whites (super watered down). Seraphim sepia on scrollwork etc.
Layers
Generally when I layer I’m using at least 2 shades in the same general scheme as the base, sometimes 3. Generally I deviate from Duncan’s edge approach once I do this, which gives my models a bit of a lighter take – my first layer will cover basically everything non recessed or shadowed. I thin the crap out of layers – the more definition I want (ie the more the model cost me) the thinner I go, hitting it with 1-4 coats depending on how vibrant I want the color to be – generally I allow the first coat to cover the whole area, the 2nd leaves a little bit of the first as an outline etc, making for a good base –> layer transition. Once I have the main layer coat down I’ll generally go with an edge highlight or possibly two on a bigger model. Which takes some time but is worth the hassle generally. Pics follow with a couple of my go to color schemes and their color sequencing. (In all likelihood I will waffle at extreme length on each project at a later date)

This guy follows my Blood Angels scheme
- Base Color – Mephiston Red
- Shades – Nuln oil pin wash
- Layer 1 – Evil Sunz Scarley
- Layer 2 – Wild Rider Red
- Layer 3 (edge) – Trollslayer Orange

For my AoS Nurgle guys I went with a darker green look which works out pretty nice
- Base Color – Incubi Darkness
- Shade – Nuln oil pin wash
- Layer 1 – Kabalite Green
- Layer 2 – Ogryn Camo (edges and spatter)
Effects
After all these steps I look for spots where some visual pop can be achieved with effects, mostly blood (blood for the blood god is amazing) or goo (nurgles rot hides all ills) but also rust (typhus corosion+ryza rust), glow effects (generally tesseract glow, although I also have a rather nice neon green from Vallejo) and some OSL efforts (various glazes of my sniny color) a couple of these can be seen below, again to be covered in excruciating depth at a later time.

Putrid BlightKing with a rusty scythe – one the blade was painted this is achieved by just glopping on a coat or two (generally two, one pretty light for the outline then heavier for the more rusted area) of Typhus Corrosion and then dry brushing with just a slight touch of Ryza Rust. Also on model there’s a bit of Nurgle’s Rot around the leg bandages…. probably to hide a shitty paint job but I’ll pretend it’s because it looks cool.
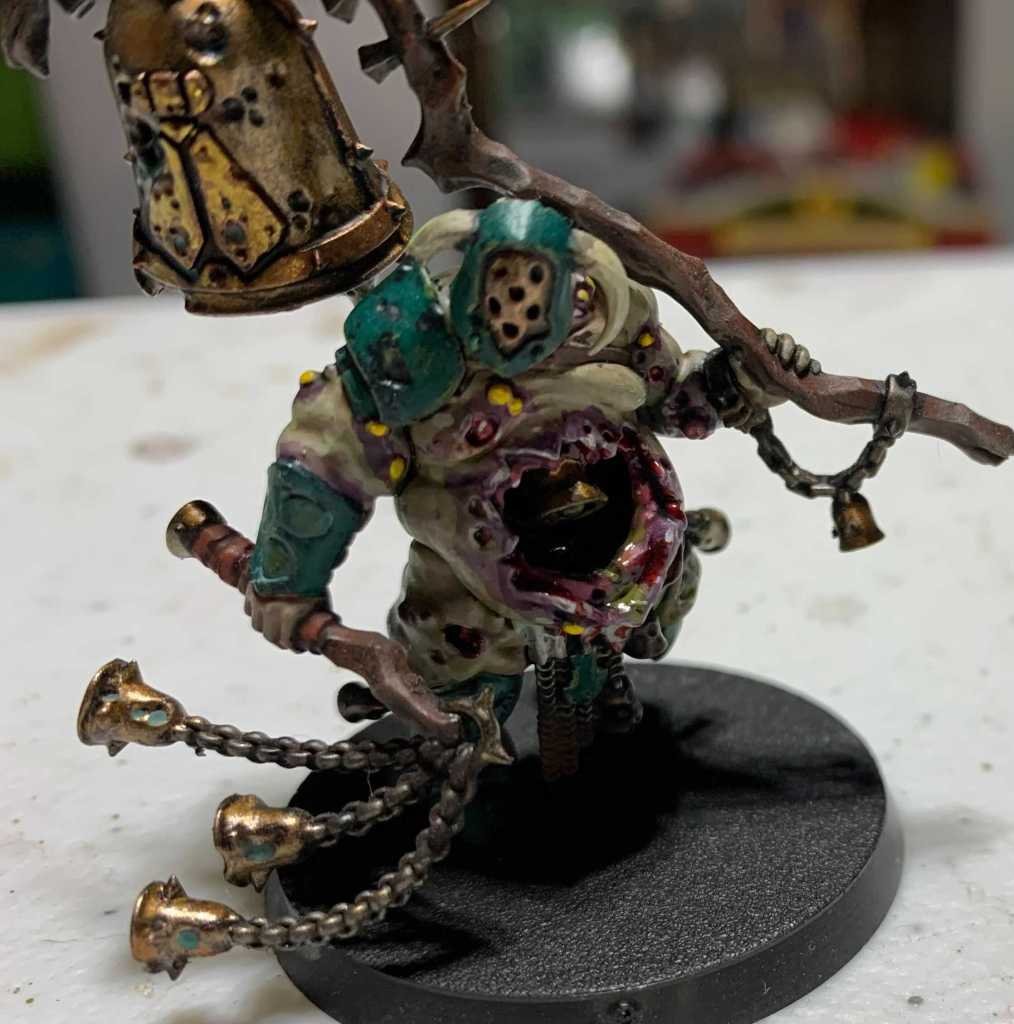
Another Putrid BlightKing (these guys are just too much) with a gaping belly wound to reveal internal chimes. On large open wounds I like to put just a slight touch of bftbg into the folds, keeping it pretty limited for effect (if you want to soak a model in btfbg I’m not gonna judge, that’d look cool too) and then adding some goopy Nurgle’s Rot to the same area. Also visible on this guy is some Nihilakh Oxide on bells etc – makes for a nice weathered copper look.
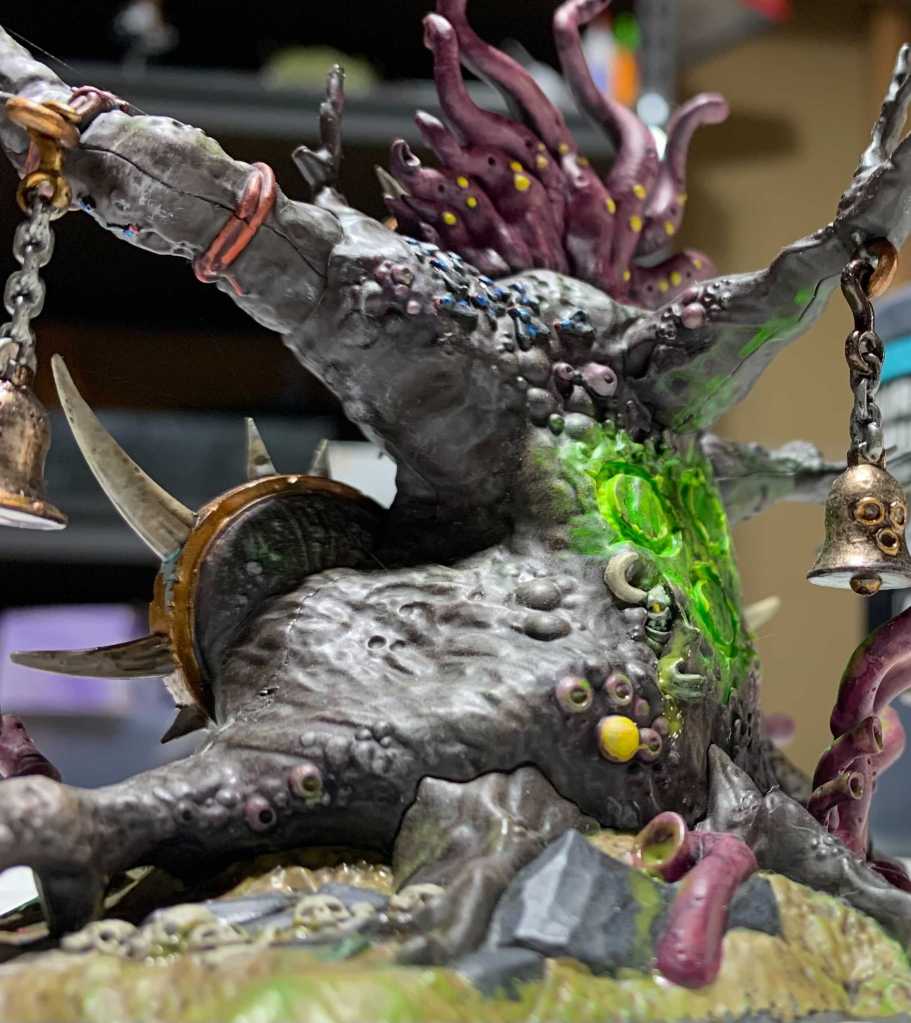
This was just some random nonsense I decided to try out with the sigil in the back of a Feculent Gnarlmaw – it worked out pretty well. The rings themselves I filled in white, then just glopped in Tesseract Glow and hoped for the best – once that looked good I took a thin layer and spread it around the area – adding some to the overhanging branch and to the back of the bell and, if I recall correctly, onto the carbuncles just south of the Nurgling. Also visible is a whole bunch of Nurgle’s rot, because it is the best.
Next up I’ll start diving in to some of the models I’ve painted. I’d love to do a full retrospective with a build on each model, but I only became obsessive about photo taking once I had full fledged mediocrity, so some of my suckier work isn’t as well documented. Or maybe something different. Rather depends how the mood takes me.

Primer, pah.
I’ve even stopped priming resin minis because Citadel paints stick so well.
LikeLike
I won’t judge, I just ask that you get behind me.
LikeLike